
Here I want to describe how to setup TeamCity on your own server. In my example, I’ll use Digitalocean as a hosting service and Ubuntu 14.04 LTS as an operating system.
To be able to run “TeamCity” on external server you need to have at least $20 monthly plan on “DigitalOcean”. If you’re using another hosting service, these are minimum* system requirements you need:
- 2 GB Memory
- 2 Core Processor
- At least 2+ GB Free Space (SSD will be great)
Please note. These are minimum requirements. For complex workflows you’ll need more powerful machine.
Before installing:
Starting from 10s version, TeamCity requires Java 8. If you’re using ubuntu 14.04 for some reason there is a guide how to install Java 8 on ubuntu 14.04.
Install TeamCity 10
On the remote server, I usually have “Downloads” directory in the root folder and I use “wget” there. If you want to just copy and paste the code from manual below, I’ll advise you to create one, by executing the following command:
sudo mkdir /Downloads
cd /Downloads
Navigate into the “Downloads” and pull up the latest version of TeamCity (2017.1.2 by the time I’m writing this article).
sudo wget https://download.jetbrains.com/teamcity/TeamCity-2017.1.2.tar.gzExtract content from downloaded archive
sudo tar -xvzf TeamCity-2017.1.2.tar.gzIt’s highly recommended (but not required) to install TeamCity into “/opt/jetbrains/” directory. So, let’s create it:
sudo mkdir /opt && sudo mkdir /opt/jetbrainsThe next step is to move our extracted folder called “TeamCity” under “/opt/jetbrains” directory:
sudo mv /Downloads/TeamCity /opt/jetbrainsThe last step for basic configuration is to create “teamcity” user:
sudo useradd teamcityAnd configure permissions for it:
sudo chown -R teamcity:teamcity /opt/jetbrains/TeamCityNow, let’s start TeamCity by executing a script:
/opt/jetbrains/TeamCity/bin/runAll.sh startYou should get output similar to this one:
Using CATALINA_BASE: /opt/jetbrains/TeamCity
Using CATALINA_HOME: /opt/jetbrains/TeamCity
Using CATALINA_TMPDIR: /opt/jetbrains/TeamCity/temp
Using JRE_HOME: /usr/lib/jvm/java-8-oracle
Using CLASSPATH: /opt/jetbrains/TeamCity/bin/bootstrap.jar:/opt/jetbrains/TeamCity/bin/tomcat-juli.jar
Using CATALINA_PID: ../logs/teamcity.pid
Tomcat started.
Starting TeamCity build agent...
Java executable is found in '/usr/lib/jvm/java-8-oracle'.
Starting TeamCity Build Agent Launcher...
Agent home directory is /opt/jetbrains/TeamCity/buildAgent
Current Java runtime version is 1.8
Lock file: /opt/jetbrains/TeamCity/buildAgent/logs/buildAgent.properties.lock
Using no lock
Done [20685], see log at /opt/jetbrains/TeamCity/buildAgent/logs/teamcity-agent.log
Wait for a while (let’s give TC time to start up) and then try to
load the following page
http://<your server>:8111. You should be able to see
TeamCity Start page.
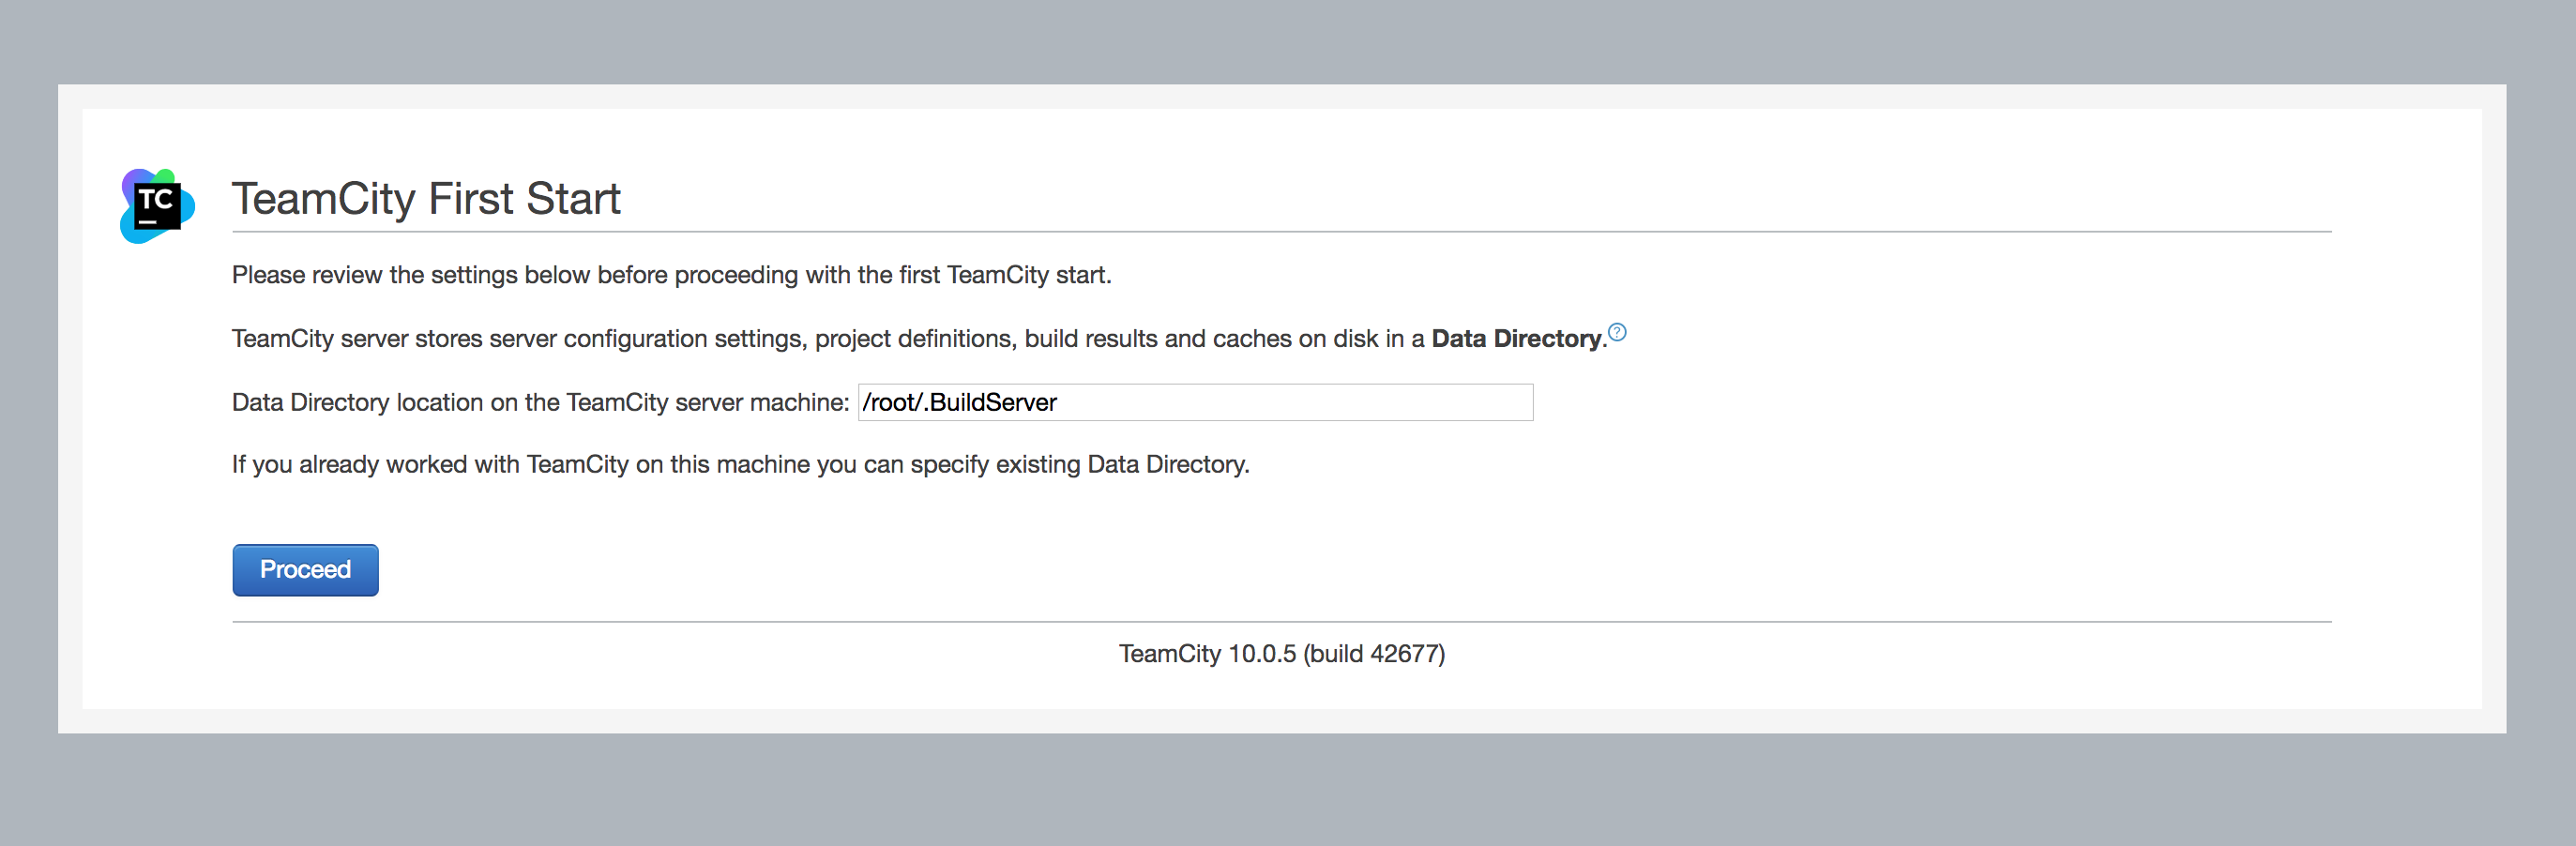
To keep our TeamCity inside its own “TeamCity” folder, let’s change “Data Directory location on the TeamCity server machine” from “/root/.BuildServer” to “/opt/jetbrains/TeamCity/.BuildServer”.
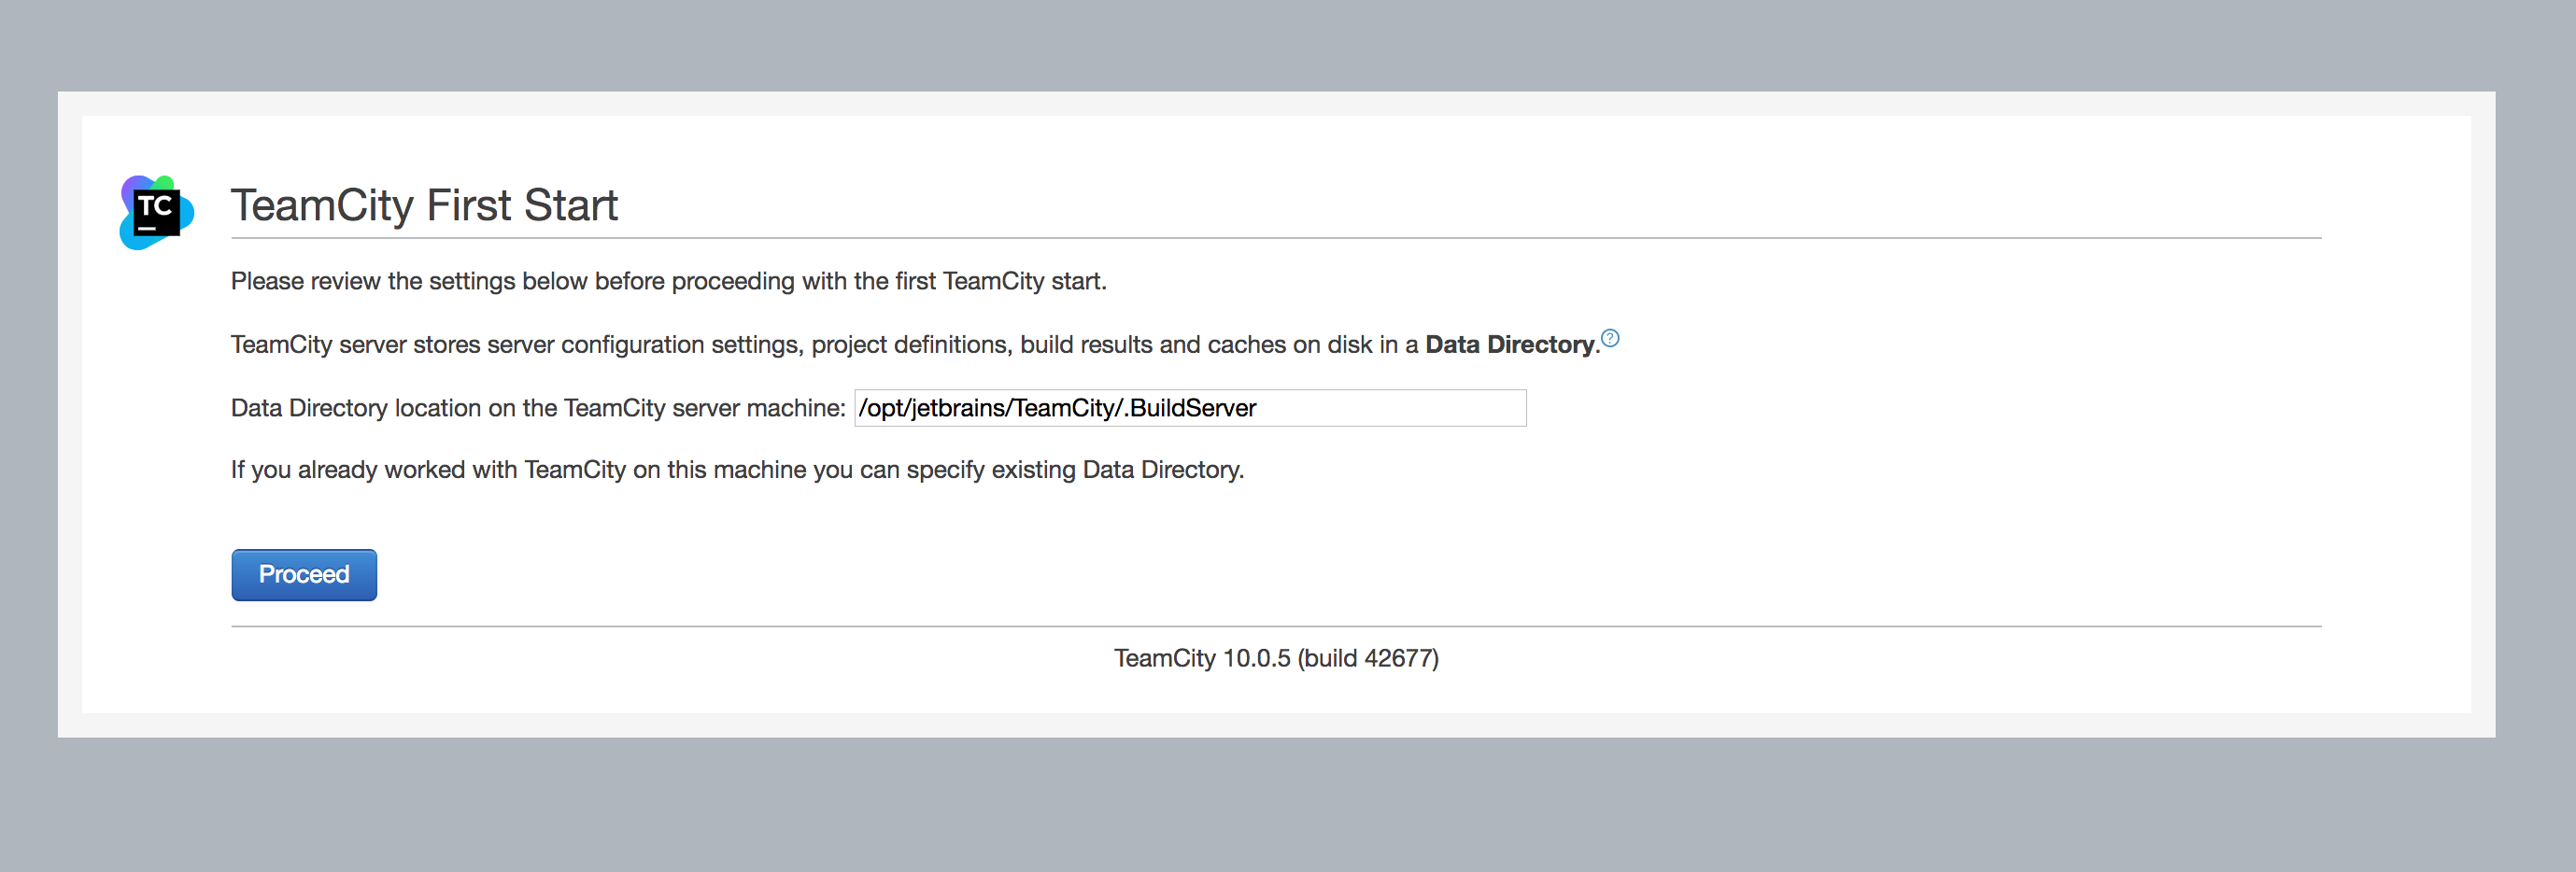
It’s time to move forward to DataBase configuration by clicking on “Proceed” button.
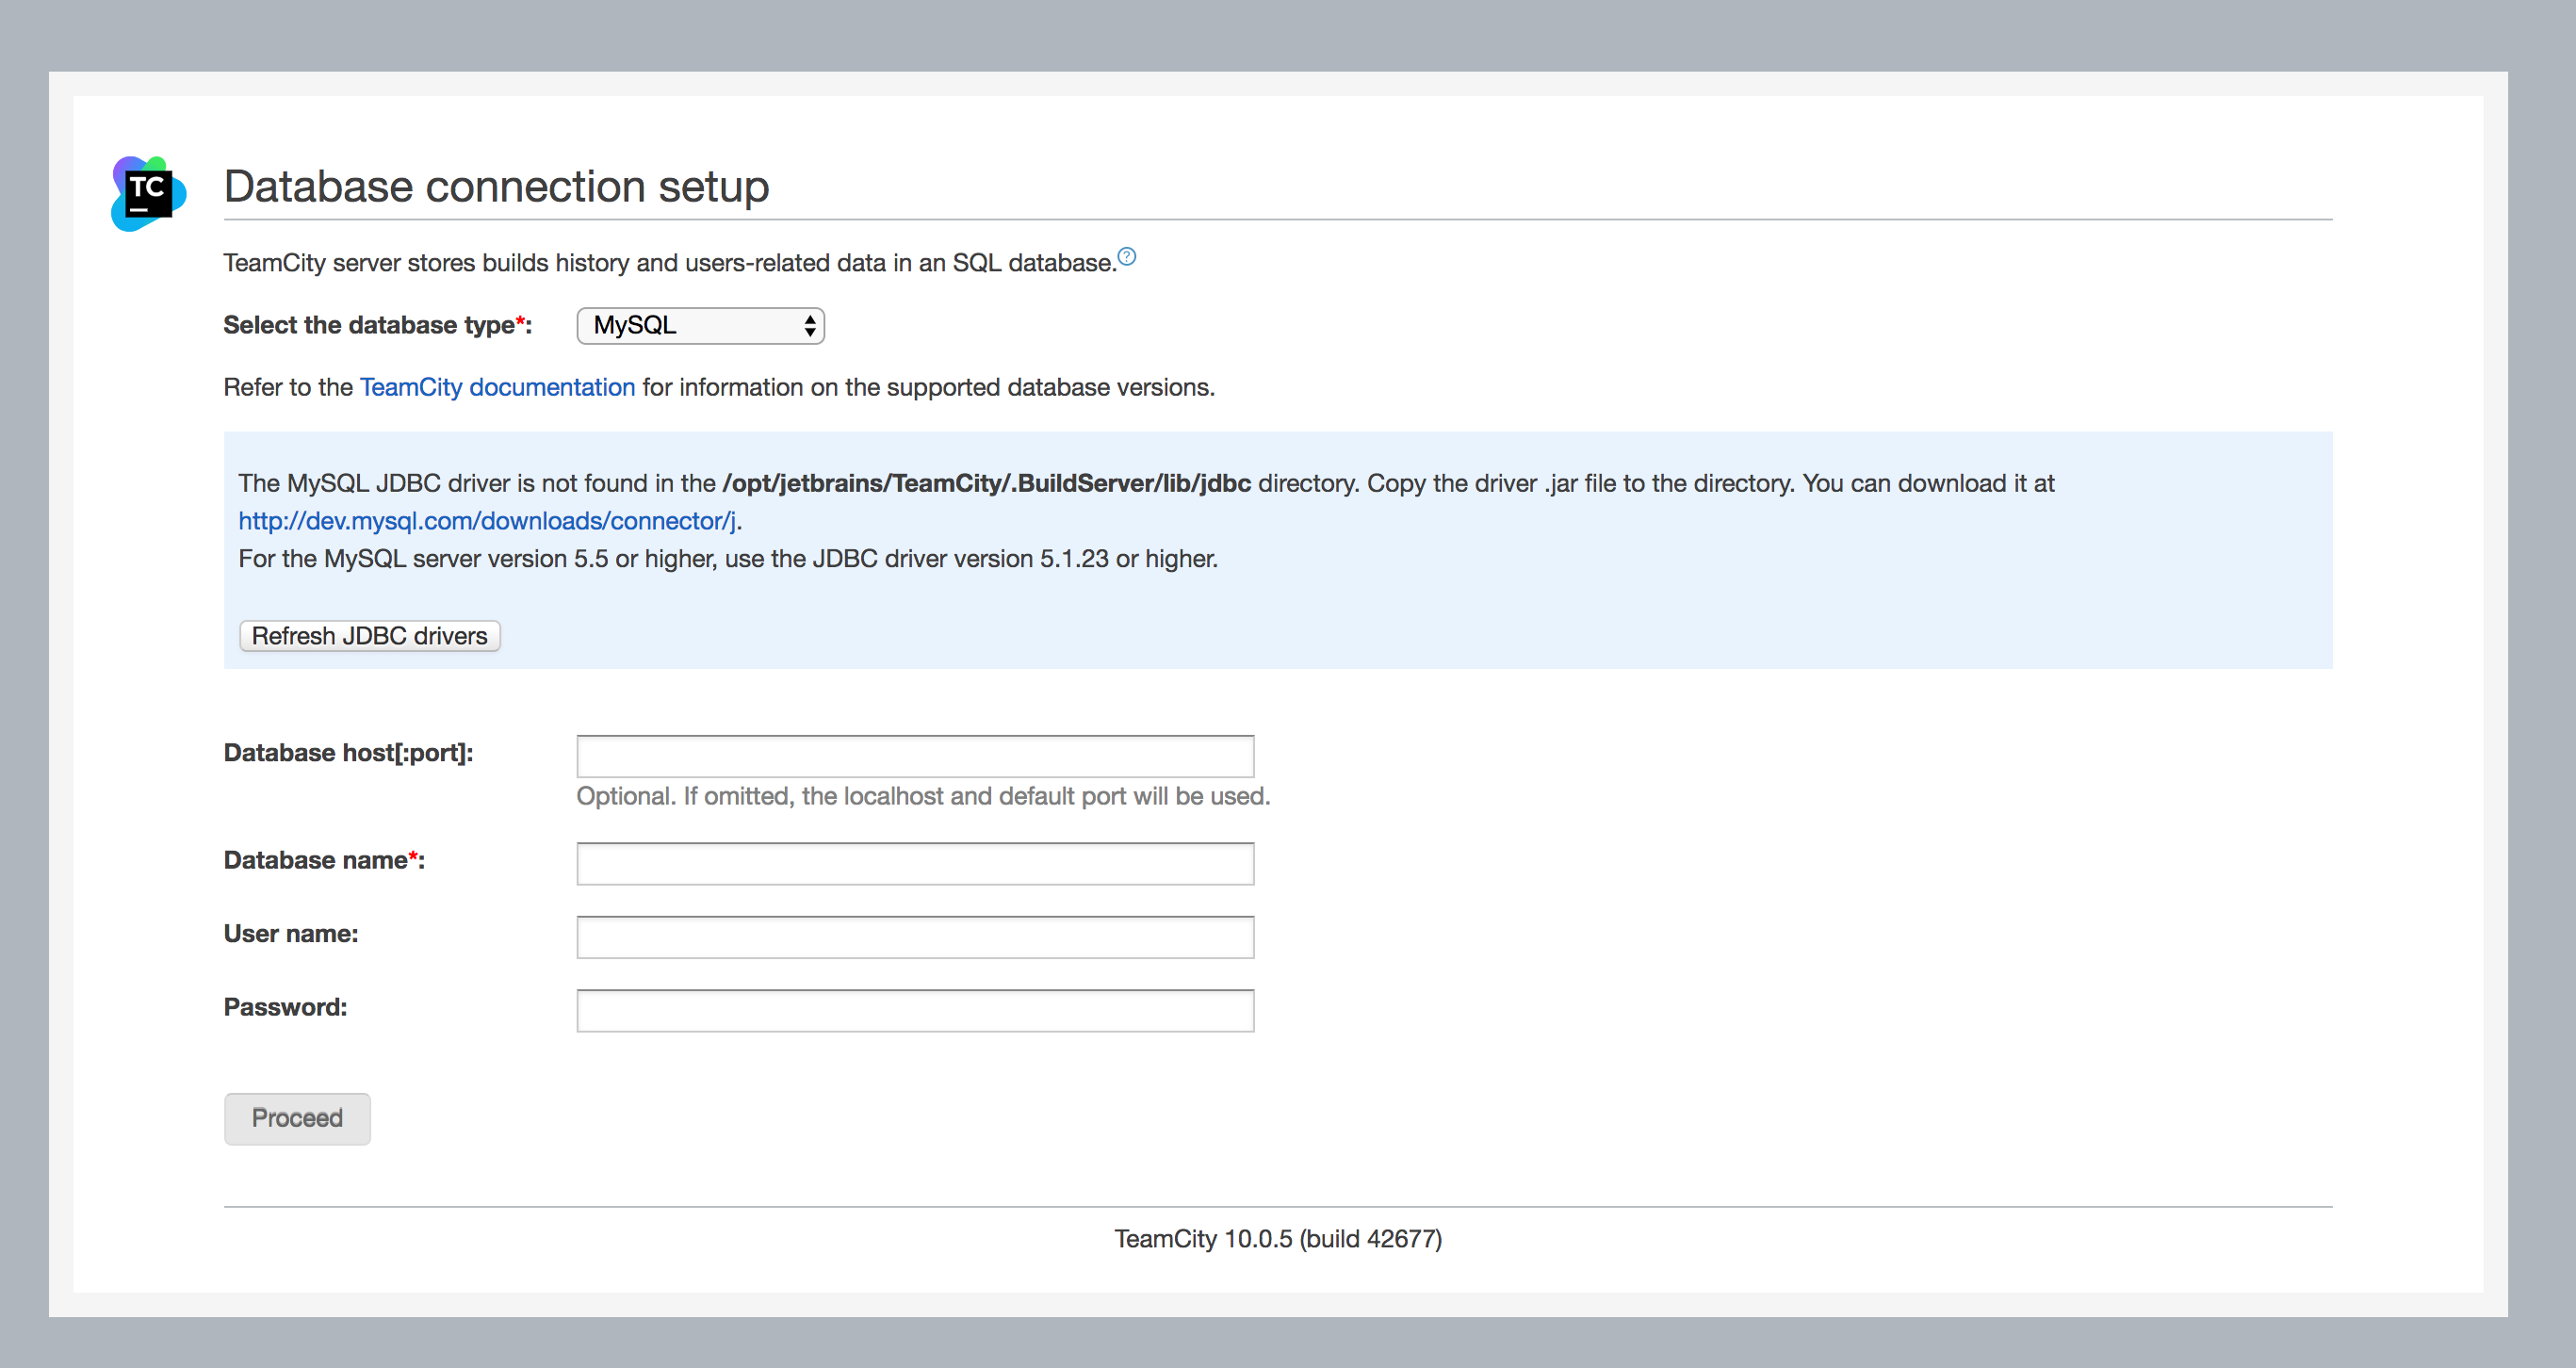
TeamCity comes with its own pre-configured database by default. However, it’s used for demonstration purposes. It’s a good idea to install and use a separate database. In this example, I’ll use MySQL. So, select MySQL from the “Select the database type” dropdown:
I’ll recommend to leave this page opened in the browser and go back to our terminal to set up the database.
Install and configure Database for TeamCity
Install MySQL (If you have it already installed just skip this step)
sudo apt-get install mysql-serverThe more detailed instruction you can find here.
Go to MySQL console by typing:
sudo mysql -u root -pCreate a database for TeamCity:
create database teamcity;Check out to it:
USE teamcity;Create teamcityuser for this database (Please select your own
password instead of <password>):
create user 'teamcityuser'@'localhost' identified by '<password>';Grant all privileges to teamcityuser for teamcity db:
grant all privileges on teamcity.* to 'teamcityuser'@'localhost';To notify MySQL that we’ve changed privileges, we need to flush them:
FLUSH PRIVILEGES;MySQL setup is completed.
exit;Let’s go back to opened page “Database connection setup”. As we can see from there TeamCity says that driver for the database is not found… And TeamCity is right! We need to download it and put into an appropriate folder. Let’s go back to the terminal again.
Install MySQL Driver for TeamCity
Here we will download and put our driver to the proper folder:
go to Downloads folder:
cd /DownloadsLet’s download MySQL JDBC driver:
sudo wget https://dev.mysql.com/get/Downloads/Connector-J/mysql-connector-java-5.1.41.tar.gzExtract it:
sudo tar -xvzf mysql-connector-java-5.1.41.tar.gzMove it into “TeamCity” specific folder:
sudo mv /Downloads/mysql-connector-java-5.1.41/mysql-connector-java-5.1.41-bin.jar /opt/jetbrains/TeamCity/.BuildServer/lib/jdbc/Fix the permissions:
sudo sudo chown teamcity:teamcity /opt/jetbrains/TeamCity/.BuildServer/lib/jdbc/mysql-connector-java-5.1.41-bin.jarLet’s go back to a web browser and click “Refresh JDBC drivers” button. “Driver not” found message should disappear and “Loaded MySQL JDBC driver version: 5.1” text should be shown.
The next step is to fill in the “database connection setup” form with data that we’ve created:
- “Database host[:port]:” -> should be empty
- “Database name*:" -> “teamcity”
- “User name*:" -> “teamcityuser”
- “Password:”
-> “
” (Password you’ve entered)
and click on the “Proceed” button.
The next steps are pretty straightforward:
- TeamCity should start initialization process and will finish it by showing profile page.
- Check the checkbox “Accept License Agreement” -> the “Create Administrator Account” page should be opened.
- Choose you admin’s username, password and create one. Once you’ve done click on “create” button.
- You should be redirected to the “My Settings & Tools” page, that means that we’ve successfully installed TeamCity on Ubuntu Server.
Conclusion
There is a simplified and minified version of our process:
- Download and install TeamCity
- Configure the Database for it
- Install MySQL drivers
There are some pros and cons of installing a TeamCity. I described major part of it. Do you need it or not, depends on your requirements and problem you’re solving.